Wednesday, November 21, 2018

Heavy Metal is done!

No not the hard rock kind. Although it's not my kind of music, the heavy metal I'm talking about is the steel siding for the garage. I got the last big pieces cut, punched and installed this past Sunday. My buddy Earl came out on Monday and together we finished the trim.


Next came the overhead doors. Plateau Garage Doors & Roofing ordered my doors a few weeks ago. Kyle, one of the owners, called me last week and we setup this Tuesday for installation. I had to clear the area and make some minor adjustments to the bracing to facilitate Kyle's work. He and his helper showed up on time at 8:00 AM, unloaded the materials and immediately went to work. By 2:00, after a 15 minute lunch break, they were done and headed to their next job. Very efficient and done at reasonable cost. I am very pleased. No motors yet, need to wait for electric to be done next spring. However the doors raise and lower with little effort and will do just fine for now.

Here is the smaller door at the back of the building...

One of the two 16' front doors...

Time lapse video of the two front doors...

So far all the subs I have used are locals and most live quite close by us. That being said, I asked Kyle for a recommendation for an electrician. Sure enough, he had a friend that can do the work and will work with me so I can do some of the wiring myself. Hmmm, I see more Youtube videos in my future. I've done some electrical before and always get accused of over-doing. Hey, anything worth doing is worth over-doing!


So my goal for this year has been accomplished. I set out to get the building up and closed in. I am a little over budget but nothing catastrophic. So yes, I am pleased. Now both the Backend of Nowhere Garage and I will rest over the winter. We'll hit hard again come Spring!


Stay Tuned!

Monday, November 12, 2018

Hurry Up and Wait...

And so the story goes. After some good progress with the help of Darren, Robert and Earl, I made even more progress. Earl came out and helped "hang metal" for a few more days. we were making great progress. The barn was getting closed in and looking something like a finished product. The pile of siding was getting smaller by the minute, so much so I was sure we were running out. Sure enough we were way short.


I texted and then went to see our supplier, Tim Troyer of Troyer Post Buildings. We discovered we were short 23 panels. When all the stuff was delivered back in the beginning, there were numerous stacks of "stuff". Tim and I went through the invoice and we found the missing sheets had never been delivered. Tim went through his supplies and found enough to cover the missing materials. He said he could cut it to length for and deliver it the next day. Great!


He showed up the next morning and stacked the panels on saw horses for me. All was right with the world. Earl came by the next day and we soon discovered we had the wrong color... Well POOP! I may have used some different words, can't remember. Earl and I took a quick trip to Troyer's. He had to order it. He said it won't be in til Monday the 12th. Oh well, Poopie happens. (Ooops, Monday the 12th is Veteran's Day! Waiting for Tuesday the 13th now.)

Meanwhile, I was able to get other parts completed. All of the clear panels and associated trim is up and looking good. Once again my good friend Earl was a great help. Pretty sure he's going to get a brake job and some other repairs out of me when this project is completed.


I think two solid days will get the place closed in with the overhead doors getting installed within a week or so. Well, fingers crossed. The weather has to cooperate, too.


My goal this year was to get the place closed in and secure. Looks like I just might make it.

Stay Tuned!
Friday, October 26, 2018

Hanging Metal with a little (okay, a LOT) of help

With the majority of framing done, it was time to install the siding. First would be the wainscoting and then some of the full panels. Never having done this before, I proceeded slowly and watched a lot of YouTube. Shout out to RR buildings for some very informative videos. If you are planning a pole barn or are just interested in how they can be built, I suggest you check out his site. This guy is a craftsman.


I was fortunate to have a level line on each pole. Robert, from Troyer Post Buildings struck this line with a laser while erecting the poles and roof. That became the baseline for each horizontal piece being installed. It didn't eliminate the need for my 4' level but it does keep things level from one side of the building to the other.

The first items that needed to be installed were the "rat" guard and "J" trim, then the trim around the overhead (OH) door openings. Rat guard is just what it says. The siding is corrugated and without it, critters could easily climb inside the building. It went on first, next came the J and OH door trim and  from there, the Hunter Green wainscoting could be installed.


A tip I learned from RR buildings was to pre-punch the siding thus allowing the screws to penetrate easily and quickly. By staking 4-5 panels atop each other I could mark the top panel and punch through all of the panels at once. I use an AWL for this. All the holes line up and are consistent down the line. Makes the installation look professional. My friend Earl and I were able to get the front and both sides done, then I ran out of materials. So, the rear wainscoting won't get finished until next week.

Last Friday, Donna's son, Darren, and his friend, Bob, came down from Cincinnati for the weekend to help with some of the longer panels. They also were able to solve some of the finer details with the trim that I was struggling with. Earl arrived on Saturday to help, too. It was a great weekend of working together and accomplishing a number of tasks. We made great progress.


I asked them to sign the building. It's something I am getting anyone that helps me with this project to do. I take pictures of the signing and will make a collage of all of the when complete. All of the signings will be covered by spray foam with just pics and memories left. Anybody else want to come sign my building?


Thank you to everyone for all the help so far. Progress may be slow, but it is moving forward. Now to get past this new batch of rainy weather so I can get this thing closed up. The overhead doors will be here soon!


Website ~ Facebook ~ Instagram ~ YouTube

Stay Tuned!

Monday, October 15, 2018

I've Been Framed


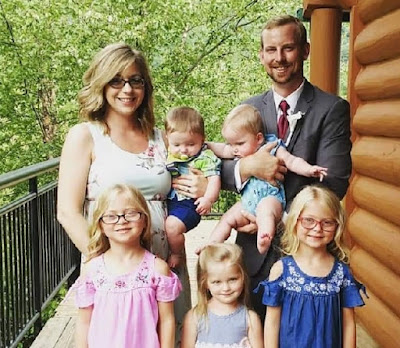
The gravel for the concrete floor has been spread and the next thing to do should be the final prep for concrete. Not gonna happen. As most of you know, we lost a family member recently. Kenny Waddell, the son of Donna's daughter's (Sheri) husband. We had just met him about 18 months or so ago. We had him and his wonderful family over for a visit and Kenny gave me some valuable advice for building my barn. While our connection was short, he will be remembered for his friendly manner and ever-ready smile.


(four girls, one boy - two sets of twins).


Obviously, the build took a backseat to family matters, resulting in not enough time to get the concrete prep done this year. However, my goal is to get the barn closed in and secure so we can do our "snowbird" thing this winter. So, my efforts have moved to getting the framing done, ordering the overhead doors, and installing the metal siding.


The majority of framing is complete, just a few more boards to put up on one side in the upper reaches. My good friend Earl and I accomplished much of the framing that could be done from the ground as well as from my newly purchased scaffolding.


I later stacked 2 scaffolding units and was able to complete the upper reaches (16 feet). I increased the stability of the scaffolding by ratchet strapping the units to the posts of the barn. We had a very solid platform to stand on and nail the boards in place. Using a small air compressor and a nail gun, the boards went up fairly quickly on the lower parts. Moving up to the higher reaches, it took longer to move the scaffolding then it took to put the boards up.


With the major portion of the framing done, I moved to locating and framing for the entry doors as well as the overhead doors. I located three 36" doors, one between the overhead doors in the front, one on the side facing to house and one centered in the rear. No doors or windows will be on the side we cannot see from the house. Two 12 ' wide and 14' tall overhead doors are framed out in the front and a 10' by 10' door in the rear. The overhead doors have been ordered and will be installed by a local company, Plateau Garage Door and Roofing. They should be up in about two to three weeks.


After the framing is fully completed, putting the siding up is next. I'm getting some help from my buddy Earl, my stepson Darren and a friend he's bringing from Cincinnati. Might get this thing closed in yet. Oh, and we saw these lights at Sam's Club. Came home and price-checked them. Twice the price elsewhere so ordered four of them for over the doors - dusk to dawn LED.


We'll see...

Stay Tuned!

Saturday, September 29, 2018

A lot is happening

In my last post we saw the electric power going underground. I really couldn't do much until that was done, so I gathered materials for the next few steps. Specifically, prepping for rough-in plumbing and getting the pad ready for concrete.


The pad is on "new" fill so it needed to be compacted. For that I rented a 6 ton vibrating compacting roller. I rolled the entire interior as well as the perimeter, compacting and settling as much of the area as possible.

Timelapse Video:


This thing did that job very well. It appears as if the entire pad was compressed by an inch or two. That's just my estimation as I didn't have the equipment to make any accurate measurements. I can say none of my vehicles leave tire tracks, the surface is very hard.


Next step was to install the rough-in plumbing. Much of this was done with the help of my good friend, Earl. Thanks buddy, I really appreciate your help for those two days we spent digging and getting very wet in the rain. All had to be in place before the concrete can be poured. It doesn't have to be connected to anything yet, just located in the right spot before the concrete makes it permanent. Measure twice...three...four times to be sure. Even with that, I still have to move the shower an inch and a half. Fortunately, easily done before the concrete comes.


My deadline for the rough-in was this past Monday (the 24th), as that was the day several truckloads of pea gravel was due to arrive and then be finished to final sub-grade level. With Earl's help we completed it just as dark set in on Sunday.


On Monday, Dave, of Horst Excavating, showed up with his skid steer and immediately got to work just after the first load of gravel arrived. Bucket by bucket, the gravel was spread, graded and finished to the correct level. Using a laser and a taut string, we raked here, added there, and removed from that side to get the sub-grade where it needed to be. Concrete will be five inches thick overall and seven inches in the area of the lift.
Video:


The next step will be to cover the entire area with 6 mil plastic (vapor barrier), install rebar and wire mesh, then get my concrete guys to check over the preparation and order the concrete.

Hope to get this done in the next few weeks and then I can get to putting the siding on and the building closed in. Well, after I get the big steel overhead doors ordered and installed.

We'll see how it goes.

Stay Tuned!